Fibreglass pools are a popular choice for many homeowners due to their durability, low maintenance, and ease of installation. These pools are made with resins and gelcoats applied to large moulds, offering a smooth, non-porous surface that resists algae growth and minimises the need for chemical treatments. Tiling a fibreglass pool can enhance its aesthetic appeal and provide a personalised touch, especially with decorative waterline tile on a fibreglass pool.
Tiles can be added at the waterline or throughout the pool to create a luxurious and customised look for your fibreglass swimming pool. The tiling process involves using specific materials, such as silicone-based adhesives and grout, which are designed to bond well with the fibreglass surface and accommodate its flexibility.
Why Tile a Fibreglass Pool?
Tiling a fibreglass pool can serve multiple purposes beyond simply enhancing its appearance. It allows for a high degree of style and customisation, enabling pool owners to select from various colours, patterns, and textures to personalise their pool. Additionally, tiles can be strategically used to define pool features such as steps, edges, and benches, which not only enhances the pool’s aesthetic but also improves safety by making these features more visible to swimmers.
Furthermore, tiling adds an extra layer of durability to the pool’s surface, offering protection against UV rays, chemicals, and general wear and tear, which can extend the pool’s lifespan and reduce maintenance needs over time.
Benefits of Tiling Your Fibreglass Pool
Tiling a fibreglass pool can certainly upgrade its aesthetics and functionality, giving your backyard a polished new look. The process involves covering the surface with tiles to achieve decorative or practical benefits, but it also requires careful planning and budget considerations. That’s why many homeowners ultimately choose modern fibreglass swimming pools for their natural beauty and low-maintenance finish, even without additional tiling or extra surface work.
Tiling a fibreglass pool provides several advantages:
- Tiles offer a wide variety of colours, patterns, and materials, allowing for a customised and attractive pool design.
- Tiles are designed to withstand harsh environmental conditions, including pool chemicals and temperature fluctuations.
- Tiled surfaces are generally easier to clean and maintain.
- Installing non-slip tiles around the pool edges and steps can improve safety by reducing the risk of slips and falls.
Cost Considerations
To manage costs, consider using standard-sized tiles, which are typically less expensive than custom options. Balancing design preferences with budget constraints can help achieve a desirable look without overspending. When planning to tile a fibreglass pool, consider the following cost factors:
- Tile Type and Cost: The cost of tiles varies based on material. Ceramic and porcelain tiles are more affordable, ranging from $1 to $35 per square foot, while glass and mosaic tiles can cost between $35 and $100 per square foot.
- Installation Costs: Understanding the costs associated with different pool types can help budget your fibreglass pool installation. Professional installation is recommended to ensure quality and longevity. Labour costs can range from $30 to $120 per hour, and full pool tiling can cost between $15,000 and $70,000, depending on the tile type and pool size.
Types of Tiling for Fibreglass Pools
Inlay (Over The Lip) Tiling
Inlay tiling, also known as over-the-lip tiling, involves embedding tiles into the pool’s surface, creating a seamless transition from the pool to its surrounding areas. This method is advantageous as it eliminates the need for waxing the exposed fibreglass lip, reducing maintenance efforts.
Inlay tiling offers a wide range of materials, such as ceramic or glass, and colours that can be matched to the pool deck or surrounding landscape. For example, a pool owner might choose blue glass tiles to mimic the look of a natural lagoon, enhancing the aesthetic of their fibreglass swimming pool. However, due to the custom fit required, replacing dislodged tiles can be more expensive.
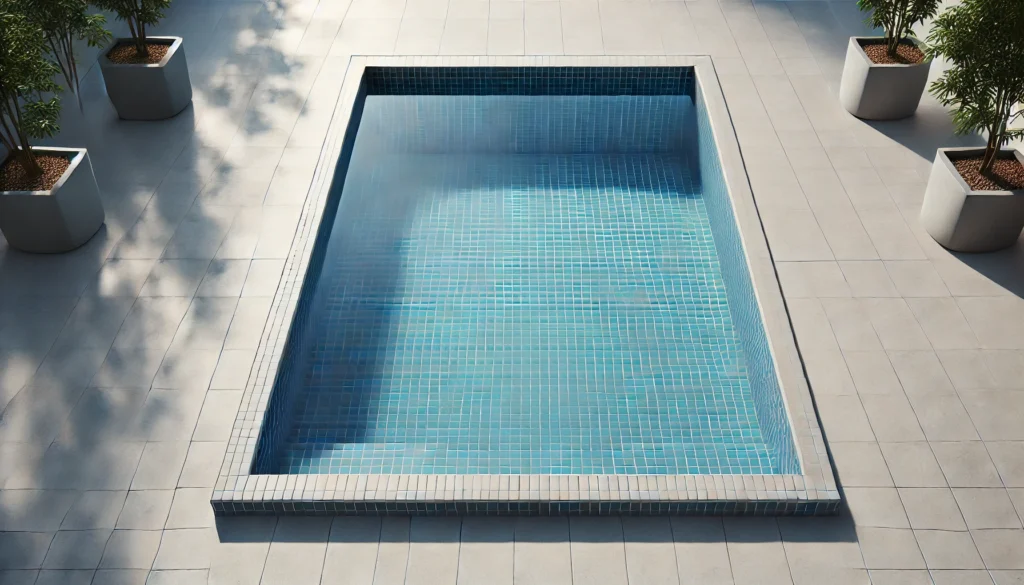
Waterline Tiling
Waterline tiling involves placing tiles at the water’s edge, creating a visually appealing and clean line that defines the pool’s perimeter. This type of tiling is practical as it makes cleaning easier and helps prevent staining from oils and debris that accumulate at the waterline.
Available in various colours and styles, waterline tiles can be customised to complement the pool’s overall design. For instance, using mosaic tiles with a wave pattern can add a dynamic visual effect to the pool. Waterline tiling also gives fibreglass pools a sophisticated look similar to that of concrete pools, enhancing the overall aesthetics for many pool owners.
Custom Tiling
Homeowners can create intricate designs or cover the entire pool surface with tiles, especially when tiling your fibreglass pool. This approach can include elaborate mosaics depicting sea life or abstract patterns, transforming the pool into a unique artistic expression. Custom tiling requires careful preparation, such as draining the pool and using specialised adhesives and grout for installation.
While this method is more expensive and labour-intensive, it results in a stunning and durable finish. For example, a pool with a custom mosaic of dolphins on the floor can create a captivating underwater scene, adding significant aesthetic value to the pool area.
Factors to Consider Before Tiling
When planning to tile a pool, several important factors must be considered to ensure a successful and long-lasting installation. These considerations include assessing the pool’s condition, deciding between DIY and professional installation, and gathering the necessary tools and equipment.
Pool’s Condition
Before tiling, it’s essential to evaluate the pool’s current state to ensure it can effectively support the new tiles.
- Surface Integrity: The pool surface must be free from cracks or damage, as these imperfections can compromise tile adhesion and lead to future issues when tiling your fibreglass pool.
- Cleanliness: Thorough cleaning of the pool surface is crucial to remove any dirt, algae, or oils that could interfere with the bonding process.
- Structural Soundness: Any structural issues, such as leaks or weak spots, should be addressed and repaired before beginning the tiling process to ensure a stable foundation.
Note
Homeowners frequently report discovering small cracks or chalking in the gelcoat after tiling which then causes adhesive failure. Always repair chalking or micro-crazing before tiling, especially on pool shells older than 8–10 years.
DIY vs. Professional Installation
Deciding whether to undertake the tiling project yourself or hire professionals is a significant consideration.
- Skill Level: Assess your own tiling skills and experience before deciding the number of tiles you want to tile. Professional installation is advisable for complex designs or if you lack experience, as it ensures quality results.
- Cost: While DIY can be more budget-friendly, mistakes can lead to costly repairs. Professional installation may have a higher upfront cost but can save money by avoiding errors.
- Time and Effort: DIY projects require a considerable investment of time and effort, whereas professionals can complete the job more efficiently and with less hassle, often taking 2-3 days to install.
Installer Insight
Coping tiles fail far more often than waterline tiles because they bridge two surfaces: fibreglass and concrete. This mixed substrate is why installers in Australian pool communities advise using flexible additives or multi-surface adhesives. Without them, even a well-laid coping tile can lift within 12–18 months as the shell moves slightly with temperature changes.
Before attempting DIY, our fibreglass pool installation guide outlines warranty requirements, backfill risks, and commissioning steps homeowners often overlook.
Also, if you’re on the fence between keeping the original surface or upgrading it, the pros and cons of fibreglass pools article will help shape your decision.
Tools and Equipment Needed
Having the right tools and equipment is essential for a successful tiling project.
- Basic Tools: Essential tools for pool installation include a notched trowel and a brush for applying the bonding agent. Essential tools include trowels, tile cutters, and grout floats, which are necessary for cutting and placing tiles accurately.
- Adhesives and grouts are essential components in the process of tiling your fibreglass pool. Use adhesives and waterproof grouts specifically designed for pool environments to ensure durability and resistance to water.
- Safety Gear: It is essential to wear appropriate safety gear while working on your fibreglass swimming pool. Protective gear, such as gloves, goggles, and masks, safeguards against dust and chemicals during the installation process.
By carefully considering these factors, you can ensure a smooth and successful pool tiling project, whether opting for a DIY approach or hiring professionals. Proper preparation and the right tools are key to achieving a durable and aesthetically pleasing result when installing pool tiles.
Preparing the Pool Surface
Thorough Cleaning
The first step in preparing the pool surface is thorough cleaning, which removes contaminants that could interfere with tile adhesion.
- Remove Debris: Begin by draining the pool and clearing away any debris, such as leaves or dirt. This allows for a clear view of the surface and ensures that no loose particles remain.
- Pressure Washing: Use a pressure washer with at least 3,000 PSI to clean the pool surfaces, focusing on stubborn residues and the waterline, which often accumulates buildup.
- Acid Etching: For concrete, plaster, or pebble finishes, apply a diluted acid solution to open up the surface pores, enhancing the adhesive grip. Use caution and appropriate protective gear when handling acids.
Thorough cleaning ensures that the pool surface is free from contaminants, providing a solid foundation for the subsequent steps.
Sanding
Sanding the pool surface creates a rough texture that improves the mechanical bond between the tiles and the fibreglass swimming pool surface. While sanding improves tile adhesion, working with expert fibreglass pool builders ensures the preparation is done correctly before any finish is applied, guaranteeing durability and a professional result.
- Select Appropriate Sandpaper: Use medium-grit sandpaper suitable for fibreglass surfaces to avoid damage while achieving the desired texture.
- Sand Evenly: Ensure even sanding across the entire surface, paying extra attention to smooth or glossy areas that require more abrasion.
- Remove Dust: Ensure that the pool lining is free from dust for optimal adhesion. After sanding, clean the surface again to remove any dust or debris, ensuring a clean slate for the bonding agent application, especially before the pool is full.
Sanding effectively prepares the pool surface by enhancing the texture, which is crucial for strong tile adhesion.
Tip
Fibreglass shells often have a glossy gelcoat that must be sanded aggressively enough to create texture. Many homeowners learned that “light sanding” wasn’t enough – tiles only bonded properly once the surface felt matte and slightly rough to the touch.
Applying a Bonding Agent
The final step in surface preparation is applying a bonding agent, which is essential for enhancing the adhesion of tiles to the pool surface, particularly when using a glass pool.
- Select the Appropriate Agent: Choose a bonding agent specifically designed for use with fibreglass surfaces and pool environments. This ensures compatibility and effectiveness.
- Apply Evenly: Use a brush or roller to apply the bonding agent evenly across the entire pool surface, following the manufacturer’s instructions for coverage and drying times, ensuring a strong bond for the tile adhesive. Even application is crucial for consistent adhesion, especially when you want to tile your fibreglass pool.
- Allow to Cure: Let the bonding agent cure completely before proceeding with tile installation. Premature tiling can compromise the bond, so patience is key when installing pool tiles.
- Inspect the Surface: Once the bonding agent has cured, inspect the surface to ensure it is evenly coated and ready for tiling. This inspection helps to confirm that the surface is properly prepared.
Applying a bonding agent completes the preparation process, ensuring that the pool surface is optimally prepared for tiling. Proper preparation is key to ensuring the durability and aesthetic appeal of the tiled surface.
Choosing the Right Adhesive and Grout (With Real-World Installer Insights)
Selecting the right adhesive for a fibreglass pool starts with understanding how the pool shell naturally moves with temperature and water pressure. Fibreglass flexes more than concrete, and this movement is what causes many DIY tiling jobs to fail within the first year.
Adhesives Commonly Used By Installers
1.Silicone-Based Adhesives
Silicone is highly flexible and performs well for waterline tiles where movement is expected. In many Australian pool DIY discussions, homeowners reported good results using silicone for small mosaic repairs because it tolerates shell expansion during hot summers.
2. Epoxy Adhesives
Epoxy is the safest choice for underwater mosaics or full-depth tiling. It forms a strong, chemical-resistant bond that doesn’t soften over time. Installers often prefer epoxy for steps and benches because these areas experience direct foot pressure.
3. Polyurethane Adhesives
Polyurethane is well suited to larger coping tiles or areas that bridge both fibreglass and concrete. It accommodates the different expansion rates of each surface better than rigid cement-based mortars.
What Real Installers Recommend (Based on Australian Pool DIY Communities)
Across homeowner and tiling discussions online, the following advice is commonly shared:
- Flexible tile adhesives designed for wet areas perform best on waterline mosaics, especially when applied over fully cured render with a compatible primer.
- For coping tiles that sit partly on concrete and partly on the fibreglass lip, many community installers prefer multi-purpose adhesives that can bond to both substrates and bend with shell movement.
- When working on older pool shells or high-movement areas, experienced tilers often enhance their adhesive with flexible or waterproof additives to minimise the chance of tiles lifting later.
These insights highlight the difference between adhesives that “work for now” versus adhesives that survive years of movement, heat, and chemical exposure.
Selecting the Right Grout
- Epoxy Grout: Epoxy grout is highly recommended for swimming pools due to its waterproofing properties and resistance to chemicals and stains. It forms a strong seal that prevents water from seeping into the substrate, making it ideal for wet environments like pools.
- Silicone Grout: Silicone grout is flexible and mildew-resistant, making it an excellent choice for fibreglass pools. It can flex with the pool’s movements, preventing cracks and maintaining a clean appearance.
- Mildew-Resistant Grout: This grout is formulated to resist mould and mildew growth, which is beneficial in humid pool environments, giving your pool a cleaner look. It is especially useful for areas that are constantly exposed to water and require additional protection against microbial growth.
Many community installers recommend adding water-resistant additives to grout mixes to reduce moisture penetration. These techniques significantly improve long-term durability.
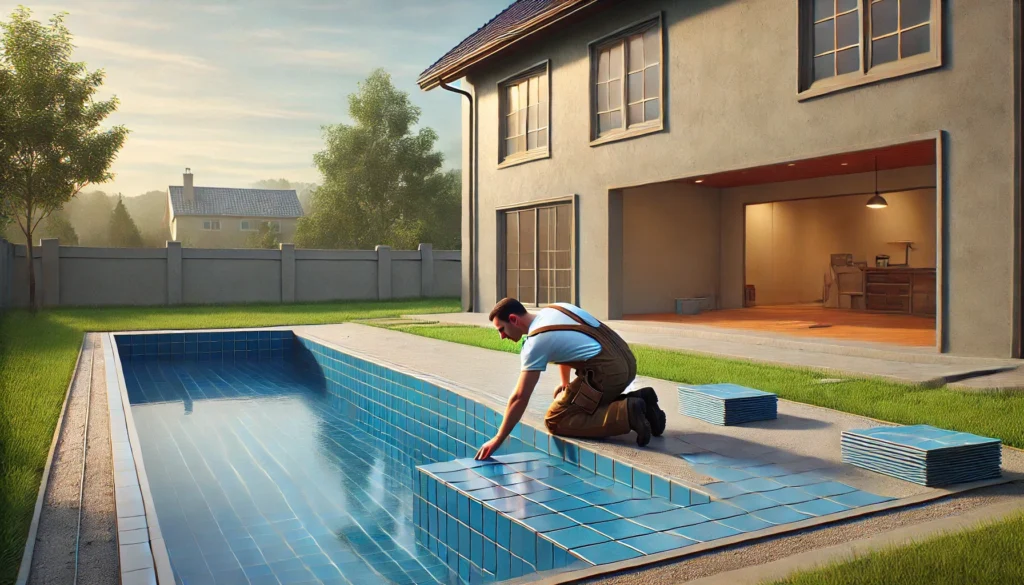
What Steps Are Involved in the Tile Installation Process
Laying out the Tiles
Laying out the tiles is the first step, requiring careful planning to achieve a balanced and attractive design for the width of the pool. Start by finding the center point of the area to be tiled and perform a dry fit by laying out the tiles without adhesive. This helps visualise the pattern and make necessary adjustments, ensuring that tiles are evenly distributed and avoiding narrow cuts along edges. Use spacers to maintain consistent gaps, typically around 3 mm for pool tiles.
Applying the Adhesive
Applying the adhesive involves selecting a suitable adhesive, such as silicone-based or epoxy, which is ideal for fibreglass pools due to its flexibility and water resistance. Use a notched trowel to spread the tile adhesive evenly across small sections of the fibreglass pool surface. For larger tiles, back buttering—applying a thin layer of adhesive to the back of each tile—can enhance the bond.
Setting the Tiles
Setting the tiles requires placing them into the adhesive and ensuring they are level and aligned. Use spacers to maintain consistent gaps and a spirit level to check for evenness. Trim tiles as needed to fit around edges or obstacles, ensuring clean and precise cuts for a professional finish.
Grouting
Grouting fills the spaces between tiles, providing a finished look and sealing the installation. Use epoxy grout for its waterproof and chemical-resistant properties. Apply the grout with a rubber float, pressing it into the gaps, and clean the tile surface with a damp sponge to remove excess grout and haze.
Sealing
Sealing is the final step, offering additional protection against water and stains. Choose a sealer compatible with both the tiles and grout, and apply it evenly following the manufacturer’s instructions. Allow adequate drying time before using the pool to ensure the sealer is fully effective.
Common Mistakes to Avoid (Based on Real Failures Seen Across Australia)
1. Skipping or rushing surface preparation
The most common failure shared in Australian pool DIY communities is tiles popping off within months due to poor surface prep. Oils, chalky gelcoat, and sunscreen residue all weaken the bond.
Several homeowners noted that failing to clean and prime the concrete beam before tiling coping was the #1 cause of coping tiles detaching during the first summer.
2. Using the wrong adhesive
Standard tile adhesive even premium indoor thin-set softens underwater. Many DIYers only discover this after tiles slide off the shell. This is why community installers consistently recommend:
- flexible water-resistant adhesives for mosaics
- multi-surface adhesives for coping repairs
- flexible or waterproof additives in high-movement zones
These patterns are based on years of real-world failures.
3. Ignoring movement between materials
Coping tiles often sit across:
- fibreglass lip
- concrete beam
- expansion joints
Each expands differently under heat. Rigid adhesives crack and shear. Installers frequently avoid this by using flexible additives or polyurethane adhesives.
4. Not following curing times in hot climates
A common problem in Queensland and Western Australia is tiling during peak heat. Adhesive skins over too quickly, reducing suction and causing hollow-sounding or loose tiles.
Experienced tilers recommend installing early in the morning when temperatures are more stable.
How to Maintain Your Tiled Fibreglass Surface?
Regular Cleaning Tips
Regular cleaning is essential to keep your pool looking pristine and to prevent damage from buildup or debris. Establishing a routine is crucial for maintaining the pool’s appearance and functionality.
- Daily Skimming: Use a pool skimmer daily to remove leaves, debris, and other contaminants from the water’s surface. This prevents debris from sinking and potentially staining the pool floor or clogging the filter.
- Weekly Vacuuming: Vacuum the pool weekly to remove dirt and debris from the floor and walls. Fibreglass pools have smooth surfaces, making vacuuming more straightforward and effective at preventing buildup.
- Brushing and Tile Cleaning: Brush the pool walls and floor weekly to prevent algae growth. For tile cleaning, use a soft brush and a specialised tile cleaner to remove calcium deposits and maintain the tiles’ visual appeal.
Regular cleaning not only enhances the pool’s appearance but also extends its lifespan by preventing damage from buildup and debris.
Handling Pool Chemicals
Proper handling of pool chemicals is vital for maintaining water quality and protecting the pool’s surfaces. Mismanagement during the installation process can lead to damage and safety hazards, particularly in fibreglass pool installations.
Regularly test and adjust the pool’s pH, chlorine, alkalinity, and calcium hardness levels. Maintaining a balanced chemical environment prevents corrosion and scaling, which can damage the pool tiles.
Store chemicals in a cool, dry place, away from direct sunlight, and follow manufacturer instructions to prevent hazardous reactions. Use personal protective equipment when handling chemicals to avoid injuries.
Repairing Cracked Tiles
For minor cracks, use a DIY patch kit with epoxy or waterproof cement to fill in the gaps. This can be a cost-effective solution for small, isolated issues.
For extensive damage, consider hiring a professional to assess and repair the tiles. Professionals can ensure a more permanent fix and prevent future issues by using specialised tools and techniques.
Regular inspection and timely repair of cracked tiles help maintain the pool’s structural integrity and aesthetic appeal.
Prefer scheduled care and warranty-safe chemistry? Ask our fibreglass pool installers in Sunshine Coast about maintenance programs and water balancing.
What Types of Tiles are Best for a Fibreglass Pool
When selecting tiles for a fibreglass pool, it’s important to choose materials that offer both aesthetic appeal and durability. Here are some of the best types of tiles for fibreglass pools, along with their unique benefits:
- Glass Mosaic Tiles: Glass mosaic tiles are a popular choice for fibreglass pools due to their dazzling appearance and durability. These tiles are resistant to fading, staining, and chemical damage, making them a long-lasting option.
- Porcelain Tiles: Porcelain tiles are known for their durability and low water absorption, making them an excellent choice for types of pool surfaces. They are resistant to fading, staining, and UV damage, ensuring the pool maintains its beauty over time.
- Ceramic Tiles: Ceramic tiles offer a cost-effective solution for pool tiling, providing versatility in design and colour options for your fibreglass swimming pool, appealing to many pool owners. Ceramic tiles are easy to replace if damaged, allowing for simple repairs without redoing the entire surface.
Each type of tile offers unique benefits, making them suitable for enhancing the aesthetic appeal and durability of a fibreglass pool. Consider your design preferences, budget, and maintenance requirements when selecting the best tile for your pool.
Working with our Brisbane partner
While this guide focuses on plunge pool costs on the Sunshine Coast, we also work closely with our trusted Brisbane partner for projects north and south of the border. If you’re planning a plunge pool in the Brisbane region or want to compare local requirements, you can learn more through Plunge Pools Brisbane.
Conclusion
We at Plunge Pools Sunshine Coast are dedicated to help you make the best decision when it comes to your pool installation. Ready for a durable, large fibreglass pool with premium waterline tiles? Get your fibreglass pool quote and installation timeline from our local team today.
FAQ
Are Concrete Pools Better than Fibreglass?
It depends on your priorities. Concrete pools offer high customisation and durability but can be more expensive and require more maintenance. Fibreglass pools are less costly to install and maintain, with a smoother surface that resists algae, but they offer limited customisation in shape and size.
Can Fibreglass Pools be Above-Ground?
Yes, fibreglass pools can be installed above ground. This option can be more cost-effective due to reduced excavation needs and can be adapted to various site conditions, such as sloping terrain. Explore more whether fibreglass pools can be installed above ground and what engineering is required.
What is the best adhesive for fibreglass pool tile?
The best adhesive for fibreglass pool tiles is typically a waterproof epoxy adhesive. Epoxy is known for its strong bonding capabilities and resistance to chemicals and water, making it ideal for pool environments.
Can I tile over fibreglass?
Yes, you can tile over fibreglass. However, proper surface preparation, such as cleaning, sanding, and applying a bonding agent, is required to ensure the tiles adhere properly to a fibreglass swimming pool.
Is a fibreglass pool cheaper than concrete?
Yes, fibreglass pools are cheaper to install than concrete pools if you’re doing a DIY project. The fibreglass pool moulds typically cost between $20,500 and $38,200, not including the installation costs. As concrete pools are typically fabricated by professionals on-site, a complete installation ranges from $39,000 to $70,000. A complete installation for fibreglass pools ranges from $45,000 to $70,000 on average, depending on the pool size and location.
How to clean tile on fibreglass pool?
Regular cleaning of pool tiles involves using a soft brush and a specialised tile cleaner to remove calcium deposits and prevent algae buildup. Weekly brushing and vacuuming help maintain the tiles’ appearance and prevent grime accumulation.
Is fibreglass pool better than vinyl?
Yes, fiberglass pools are often considered better than vinyl liner pools due to their durability, lower maintenance requirements, and longer lifespan. While they typically cost more, they offer a smoother surface that resists algae growth and requires fewer chemicals. In contrast, vinyl liner pools can be more affordable upfront but need replacements every 5 to 10 years, which can add to long-term costs. Read more in our latest article: Vinyl or Fibreglass Pools.