At Plunge Pools Sunshine Coast, we design and install large fibreglass pools built for the local lifestyle. From Caloundra to Noosa, our team handles everything from council approvals, site preparation, and professional installation so you can relax while your backyard transforms.
In this guide, you’ll learn the exact steps involved in fibreglass pool installation from first site inspection to final water testing. We’ll explain what happens at each stage, what to prepare, and how to avoid common mistakes, so you can plan your new pool with total confidence.
Table of Contents
ToggleWhat Is a Fibreglass Pool and How Does It Differs from Concrete or Vinyl
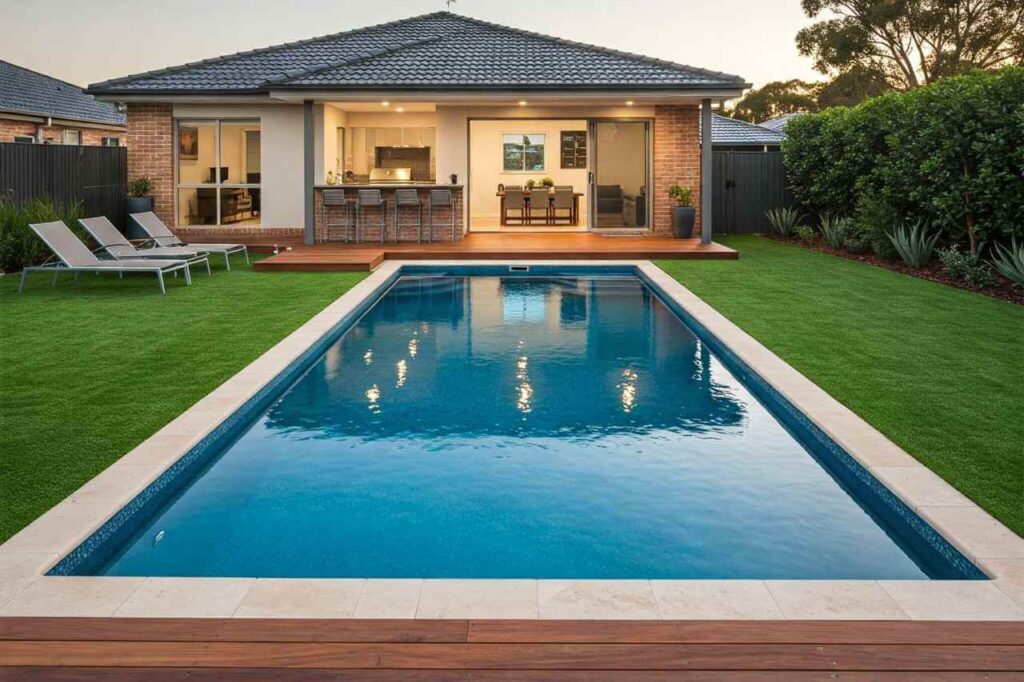
A fibreglass pool is a pre-moulded shell made from resin and glass fibres. It’s built in a factory, delivered to your home, and installed in one piece, making it one of the quickest and cleanest pool types available. The surface is smooth to touch, gentle on skin, and resistant to algae, which means less cleaning and lower maintenance costs over time.
Unlike concrete pools, which are built on-site and need weeks to cure, fibreglass pools come ready to install. They also flex slightly with ground movement, which helps prevent cracking perfect for the sandy soil and shifting ground common across the Sunshine Coast. Most fibreglass shells also come with a structural warranty of up to 25 years, giving homeowners peace of mind and long-term value.
Pool Material Comparison
| Type | Installation Time | Maintenance | Durability |
|---|---|---|---|
| Fibreglass | 4–6 weeks | Low | 20+ years |
| Concrete | 3-6 months | Moderate | 30+ years |
| Vinyl | 4–6 weeks | High (liner replacement) | 10–15 years |
For Sunshine Coast homes, a fibreglass pool is ideal. The gelcoat surface reflects heat and resists UV damage, while the flexible composite shell adapts well to coastal conditions. Together, these features make fibreglass pools a smart, long-lasting investment for busy families who want a large, low-maintenance pool that looks great all year round.
If you’d like to know how fibreglass compares with other pool materials in performance and lifespan, our comprehensive fibreglass pool guide breaks it all down clearly.
Also, for a full comparison of vinyl liner pools versus fibreglass options, see our vinyl vs fibreglass pool breakdown to help decide which suits your backyard.
The Science Behind Fibreglass Pool Durability
Why It Lasts So Long:
- UV-resistant gelcoat stops colour fading under the strong Sunshine Coast sun.
- Flexible resin layers move with the soil and prevent cracks during heavy rain or dry seasons.
- Salt-resistant finish protects the shell from corrosion in coastal water systems.
These features work together to make fibreglass one of the most durable pool materials available. The pool shell is made from multiple layers of resin, glass fibres, and a protective gelcoat, creating a strong yet slightly flexible structure. This design allows the pool to handle soil movement and temperature changes without damage, something rigid materials like concrete often struggle with.
The gelcoat surface also creates a smooth, non-porous barrier that resists algae, staining, and osmosis (tiny water bubbles forming under the surface). This makes the water easier to maintain and keeps the pool looking new for years.
Because of this combination of strength, flexibility, and corrosion resistance, fibreglass pools are especially reliable in coastal environments like the Sunshine Coast, where humidity, heat, and salt exposure can wear down other materials faster.
Step 1: Your Guide to Site Assessment and Council Approvals (1 to 3 weeks)
Before any digging begins, your pool installer visits your property to check access points, boundaries, and soil type. These early inspections make sure the pool can be delivered and installed safely without surprises later.
On the Sunshine Coast, approvals normally take one to three weeks, depending on the council’s schedule. Under Queensland’s pool safety standard AS 1926.1, your pool design must meet setback, drainage, and fencing rules before work can start.
Your builder or licensed installer will:
- Prepare plans and engineering drawings for council submission.
- Check boundary setbacks and underground services.
- Ensure pool fencing layouts meet safety codes.
Working with a QBCC-licensed installer familiar with Sunshine Coast Council procedures helps avoid delays, keeps your project compliant, and ensures a smooth start to your pool build.
Step 2: Excavation and Ground Preparation (1 to 3 days)
Once your council approvals are cleared, the real work begins. Your installer marks out the pool shape and position, making sure it matches your approved plan and property layout. Then, excavation starts.
On the Sunshine Coast, the sandy soil is easy to dig but can shift after heavy rain. That’s why professional installers use compaction equipment and drainage layers to keep the ground firm and prevent future movement.
To protect your property and neighbours, your builder will:
- Place temporary fencing for site safety.
- Use boards to protect driveways and garden paths.
- Manage soil removal and truck access efficiently.
Avoid These Common Mistakes
- Over-excavation: Digging too deep can cause the shell to move later.
- Poor drainage: Trapped water behind the shell adds pressure and may cause bulging.
- Uneven base: An unlevel base affects coping and waterline alignment.
A solid, compacted base sets the stage for a stable and long-lasting pool. Using crusher dust or a sand-cement mix, installers level the bottom to exact measurements before the fibreglass shell arrives. Getting this part right is key to a smooth installation and perfect final finish.
Step 3: Delivery and Pool Shell Placement (1 day)
The most exciting part of your pool build happens when the fibreglass shell arrives at your property. Delivered by truck and lifted carefully by a crane, the shell is positioned directly into the prepared hole. This process usually takes one day if the weather is good.
Before installation day, your builder checks:
- Crane access – clear driveways and remove obstacles.
- Overhead powerlines – ensure safe clearance.
- Site stability – confirm the base is compacted and level.
Once the shell is lowered, the installer double-checks that it sits evenly on the base, with plumbing and drainage lines aligned. Precision here matters; a few millimetres off can affect the waterline or coping later.
After placement, the team secures the shell to prevent shifting before the next steps begin. Seeing your pool shell in place is a major milestone, your new Sunshine Coast pool is finally taking shape!
Step 4: Plumbing, Backfill, and Filtration Setup (2 to 4 days)
After your pool shell is in place, it’s time to connect everything that keeps it running smoothly. This step involves installing the plumbing system, setting up filtration lines, and securing the pool shell with backfill.
Your licensed installer will:
- Fit skimmers, returns, and suction lines for circulation.
- Connect filtration equipment, such as pumps, filters, and chlorinators.
- Run electrical work for lighting and automatic cleaning systems.
Before backfilling, the system is pressure-tested to check for leaks, a simple but important step that saves costly repairs later. The area around the shell is then filled with a sand-cement mix, locking the pool securely into position while maintaining flexibility for ground movement.
For Sunshine Coast homes, where humidity and sandy soil are common, proper backfilling and drainage are essential. Using energy-efficient pumps and variable-speed systems during installation also helps reduce running costs and keep water clean year-round.
Once this stage is complete, your pool is watertight, stable, and ready for the finishing touches.
Step 5: Coping, Paving, and Surrounding Works (3 to 5 days)
This stage turns your pool area from a worksite into a beautiful outdoor space. Once the shell and plumbing are secure, your installer begins adding coping, paving, and surrounding finishes that frame your pool and connect it to your backyard design.
You can choose from a variety of materials, including:
- Stone coping for a natural and elegant look.
- Concrete surrounds for durability and easy cleaning.
- Composite decking for a modern, slip-resistant surface.
On the Sunshine Coast, using slip-resistant and UV-stable materials is important because of the region’s strong sun and humid climate. Many homeowners also pick locally sourced stone or pavers for an eco-friendly and stylish finish.
Design Tips for Large Backyards
If you have a big outdoor space, consider adding:
- A seating area or poolside pergola for shade.
- LED lighting for nighttime swims.
- Landscaping with tropical plants or privacy screens.
These finishing touches make your fibreglass pool area safer, more inviting, and aligned with your home’s outdoor style. By the end of this step, your pool will look almost complete — ready for water filling and final testing.
Step 6: Filling, Testing, and Balancing the Pool (1 to 2 days)
Once your pool is fully built, it’s time to fill it with water and make sure everything works perfectly. This step usually takes one to two days, depending on the pool size and water pressure.
As the pool fills, your installer will:
- Check the plumbing and filtration system for leaks.
- Test water circulation and equipment performance.
- Balance the pH and chlorine levels to keep the water crystal clear.
Balancing the water early prevents surface stains, protects the gelcoat finish, and ensures the pool is safe for swimming. Your installer will also explain how to maintain proper water chemistry to keep it looking great all year round.
If you want to keep the water clear year-round, this fibreglass algae-prevention guide explains the exact steps to stop green, yellow, and black algae before they appear.
Maintenance Tip
Keep your pool’s pH between 7.2 and 7.6 and test it weekly, especially in summer when sunlight and heat affect chlorine levels.
Once the tests are complete and the water is balanced, your Sunshine Coast fibreglass pool is officially ready for its first swim!
Step 7: Safety Inspection and Certification (1 to 2 days)
Before you can dive in, your new pool must pass a safety inspection. This ensures it meets all Queensland pool safety standards and is safe for your family to use.
A licensed pool certifier will visit your property to check:
- Pool fencing height and gate latches
- Boundary clearances and access points
- Warning signs and non-climb zones
Once your pool passes inspection, you’ll receive a Form 17 Pool Safety Certificate, as required under the Queensland Building and Construction Commission (QBCC) guidelines. This certificate proves your pool meets state safety rules and allows you to start using it officially.
Most inspections are completed within one to two days, depending on availability. Working with a builder experienced in Sunshine Coast Council compliance helps avoid re-inspections or costly fixes.
With certification done, your pool is now fully approved and ready for swimming, the final step before adding those personal touches around your outdoor space.
Understanding Fibreglass Pool Warranties and Structural Risks
Most fibreglass pools include a warranty covering the shell, gelcoat, and workmanship. Always read the details, some exclude ground movement or poor installation. A trusted installer like Plunge Pools Sunshine Coast provides both manufacturer and installation warranties for peace of mind.
Step 8: Timeline Overview and Cost Expectations
On average, installing a fibreglass pool on the Sunshine Coast takes four to six weeks and costs between $50,000 and $100,000. The total time and price depend on your pool’s size, site access, soil type, and chosen finishes.
Here’s a simple breakdown of what affects cost and timing:
| Stage | Timeframe | Main Factors |
|---|---|---|
| Site inspection & approvals | 1–3 weeks | Council permits, documentation |
| Excavation & ground prep | 1–3 days | Soil condition, site access |
| Shell delivery & placement | 1 day | Crane access, weather |
| Plumbing & backfill | 2–4 days | Pool size, equipment |
| Coping & paving | 3–5 days | Materials, design choice |
| Filling & testing | 1–2 days | Water pressure, balancing |
| Safety inspection | 1–2 days | Certifier schedule |
Compared to a concrete pool, which can take 3 – 6 months and needs more maintenance, a fibreglass pool saves you both time and ongoing costs. It’s a smart choice for Sunshine Coast families who want a large, long-lasting pool without long construction delays.
With a fixed installation plan, clear pricing, and experienced local builders, you can expect your new pool to be ready to swim in just over a month.
Step 9: Preparing Your Home for Installation (Before Work Begins)
Before the trucks and cranes arrive, there are a few simple things you can do to make sure the installation runs smoothly and safely. A little preparation helps avoid delays and keeps your property protected during the build.
Here’s What to Do Before Installation:
- Clear access paths: remove cars, bins, and garden furniture so trucks and cranes can move freely.
- Notify neighbours: let them know about delivery dates and possible noise.
- Secure pets and children: keep them safe and away from the work area.
- Check utilities: confirm power and water connections are working.
- Review insurance: make sure your property and builder are covered during construction.
Doing these steps ahead of time helps your Sunshine Coast fibreglass pool installation stay on schedule and stress-free.
How to Choose the Right Installer
When picking a fibreglass pool installer, look for:
- A QBCC licence and strong local reputation.
- Clear, detailed quotes with all costs included.
- Warranty coverage for both the pool shell and installation.
- Past project photos or client references.
Choosing an experienced Sunshine Coast builder ensures your pool meets local standards, stays within budget, and lasts for years to come.
Once your site is ready and your builder confirmed, you’re only weeks away from enjoying your brand-new backyard pool!
Plunge Pools Sunshine Coast has become the go-to for high-quality fibreglass pool installations trusted by homeowners from Caloundra to Noosa.
Conclusion
Installing a fibreglass pool is one of the fastest ways to upgrade your Sunshine Coast home. With the right builder, you can go from an empty yard to a stunning, low-maintenance pool in just a few weeks.
At Plunge Pools Sunshine Coast, we handle everything from approvals to handover, so you can relax while we bring your dream pool to life.
Transform your outdoor area with professional fibreglass pool installation on the Sunshine Coast, designed, engineered, and installed to last decades.
Ready to start? Contact Plunge Pools Sunshine Coast today for a free quote and start swimming sooner.
FAQs
How does a fibreglass pool compare to a concrete in durability and design flexibility?
A fibreglass pool installs faster and needs less upkeep than concrete or plunge pools. While concrete can be custom-shaped, fibreglass shells are smoother, resist cracking, and keep their colour longer in the Sunshine Coast climate.
Are there eco-friendly or energy-efficient options for fibreglass pools on the Sunshine Coast?
Yes. Modern fibreglass pools can include solar heating, variable-speed pumps, and eco-filters. These upgrades lower energy use and running costs while keeping the water warm and clear year-round.
What are the most common problems homeowners face after fibreglass pool installation, and how can they be prevented?
Minor stains or poor water balance are the most common. You can prevent these by checking water chemistry weekly, keeping good drainage, and booking regular inspections with a licensed pool builder.
Can fibreglass pools be renovated, resized, or resurfaced in the future?
Yes. You can resurface, re-tile, or update lighting and coping to give your pool a fresh look. Full resizing is limited, but most upgrades can extend the life of your existing pool for many more years.

